Forget those sad, vinegary dipping kits from the grocery store that leave your fingers neon pink for a week.
We’re leveling up your basket game with designs that actually look like they belong on a Pinterest board.
Ready to make your neighbors jealous?
1. The Sophisticated Marble Look
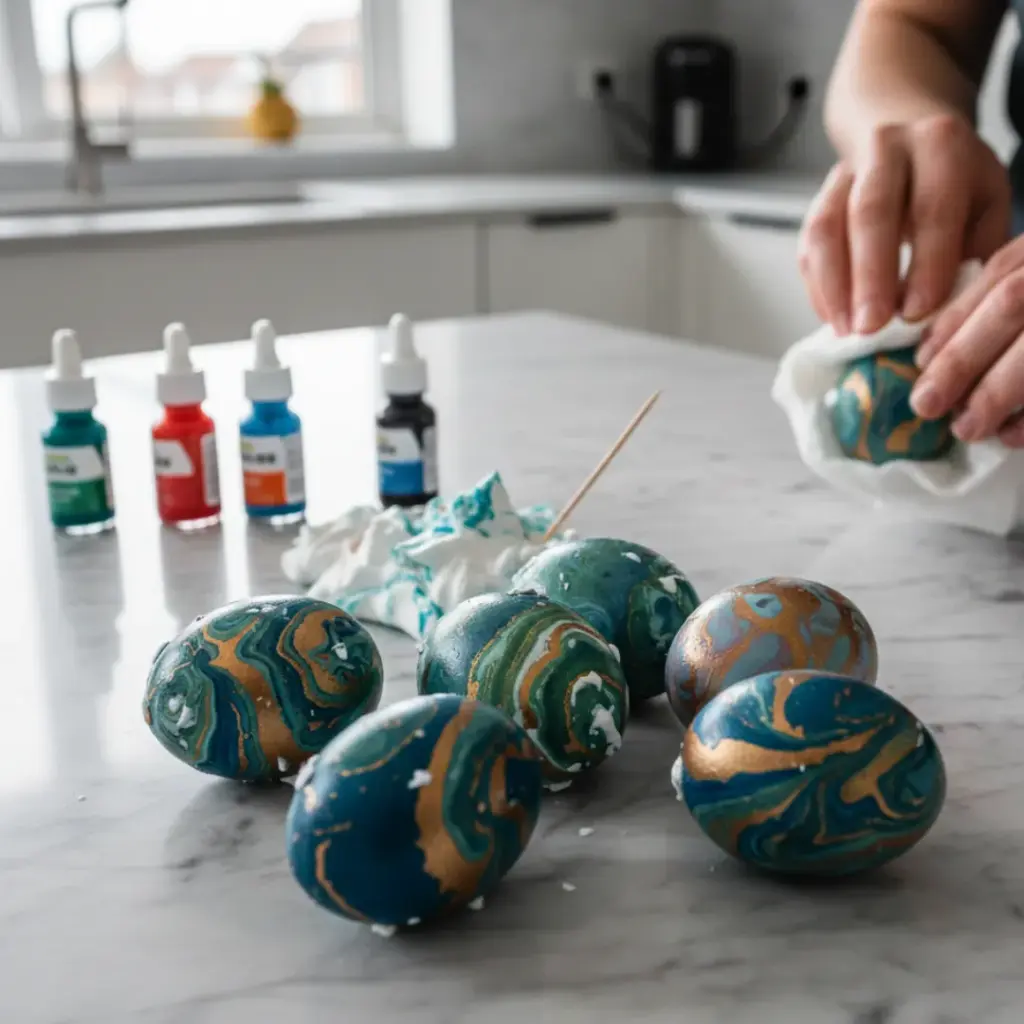
I honestly thought marbling required a degree in fine arts until I tried the shaving cream method.
You just spread some foam, dot your colors, and swirl them with a toothpick.
It’s messy, satisfying, and looks like expensive Italian stone.
- Use gel food coloring for the most vibrant swirls.
- Let the eggs sit in the foam for at least ten minutes.
- Wipe—don’t rinse—the cream off to keep the color deep.
Ever noticed how the “mistakes” usually end up looking the coolest?
2. Pressed Flower Elegance
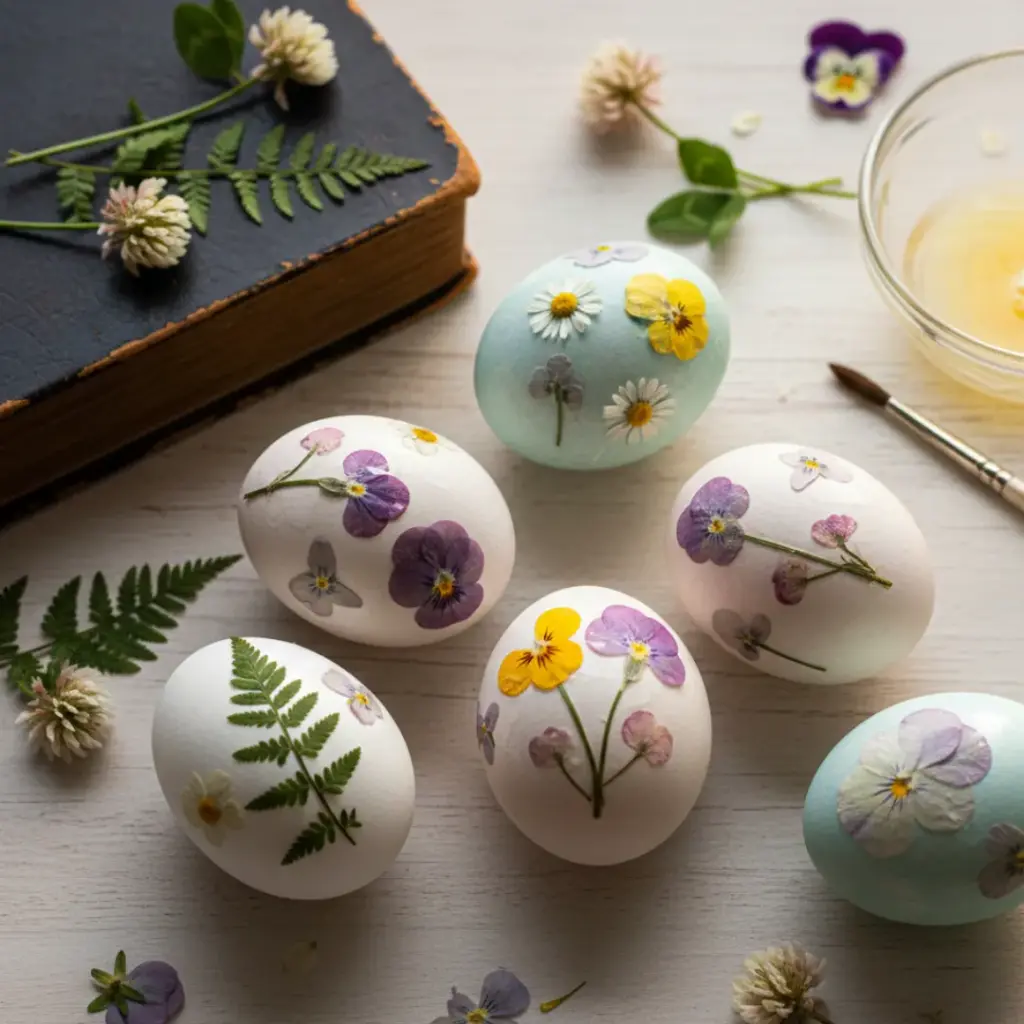
If you want to feel like a woodland fairy, this is your vibe.
I pick tiny clovers and pansies from my yard and use a bit of egg white as natural glue.
It’s organic, classy, and surprisingly sturdy once it dries.
- Flatten your blooms in a heavy book for a day.
- Brush a thin layer of egg white onto a boiled egg.
- Press the flower down and seal with another layer.
Who knew weeds could look this high-end?
3. The Botanical Blueprint
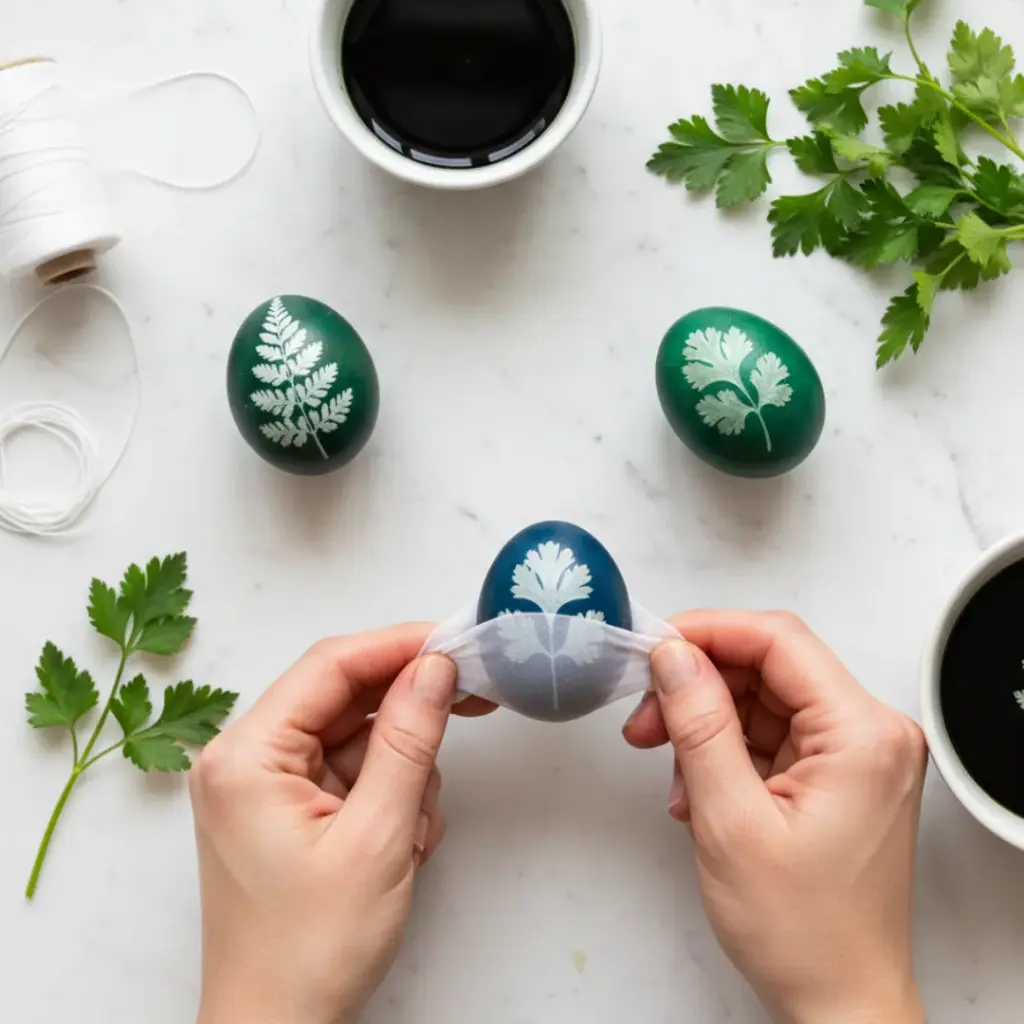
Think of this as the “fancy silhouette” technique.
You wrap an egg in a nylon stocking with a leaf pressed against the shell before dropping it into the dye.
When you peel the leaf off, you get a crisp, white ghost image of the plant.
- Parsley and cilantro leaves create the best “fern” looks.
- Tighten the nylon completely to prevent dye leaks.
- Darker dyes like navy or forest green provide the best contrast.
4. Metallic Foil Bling
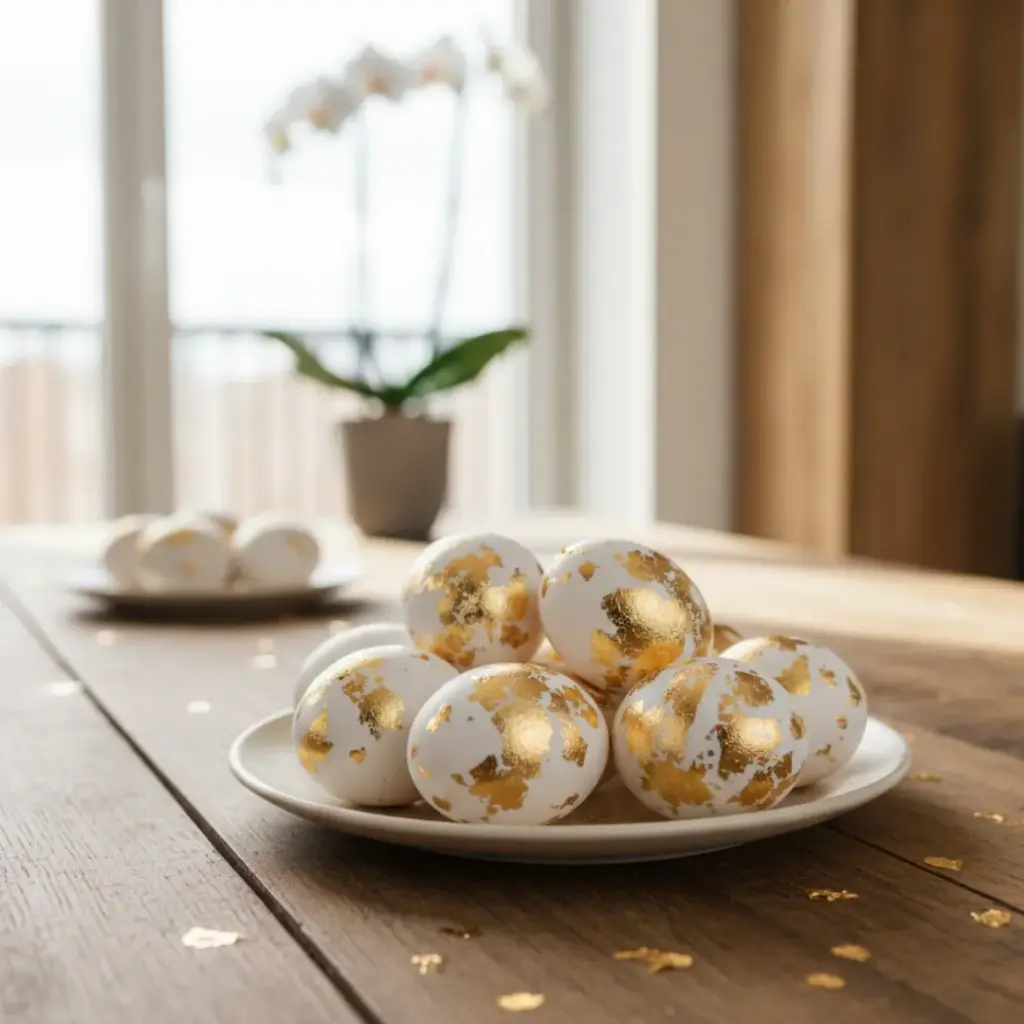
I’m a sucker for anything shiny, and gold leaf takes an egg from “daycare craft” to “royal treasury” real quick.
You don’t even have to cover the whole thing. A few random gold flakes on a white shell look effortlessly chic.
Does anyone actually eat the gold ones, or are they strictly for gazing upon?
IMO, they’re too pretty to crack. 🙂
5. Watercolor Masterpieces
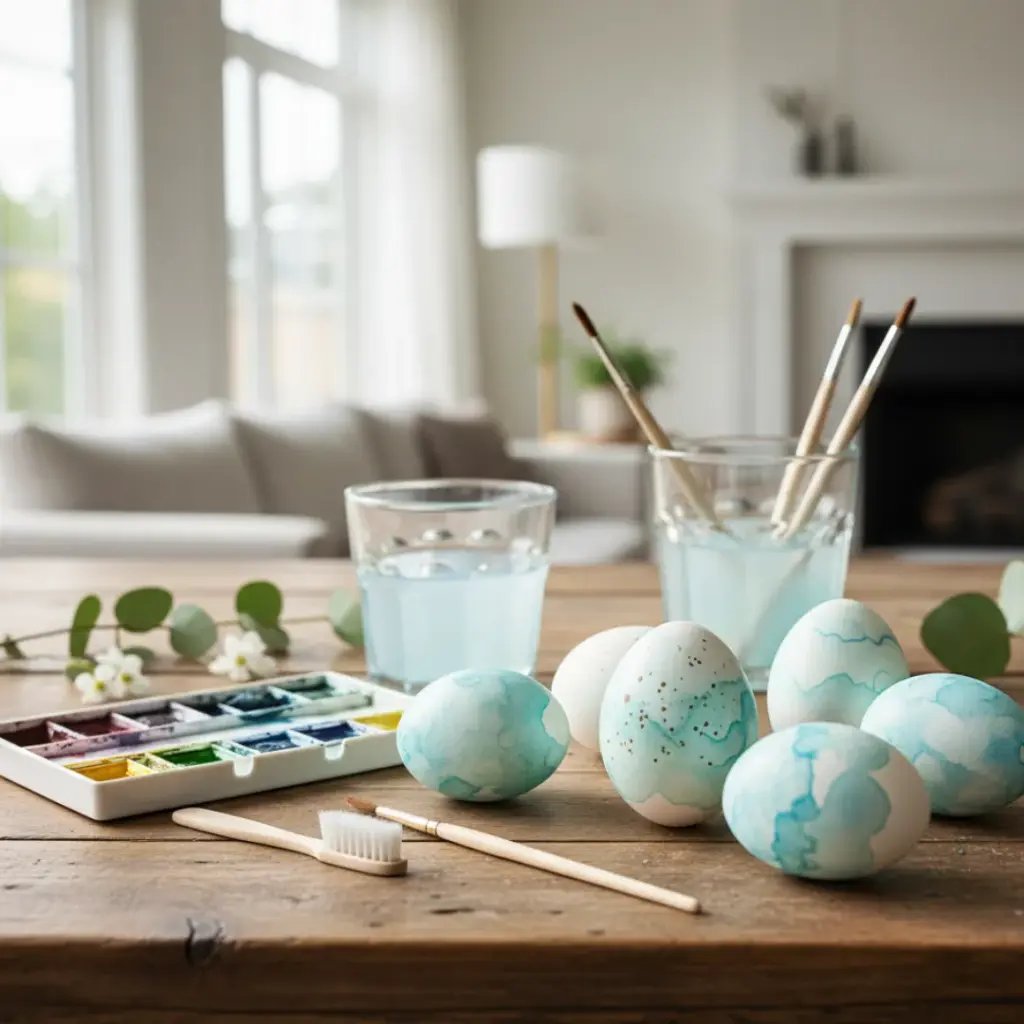
Grab those dusty paint palettes from the junk drawer.
Watercolor paints allow you to build layers and create soft, dreamy gradients that dye baths just can’t touch.
I love flicking the brush to create a speckled robin’s egg effect.
- Keep your brush relatively dry for better control.
- Layer light blues over tan eggs for a natural look.
- Add tiny brown dots with a stiff-bristled toothbrush.
6. Geometric Washi Tape Designs
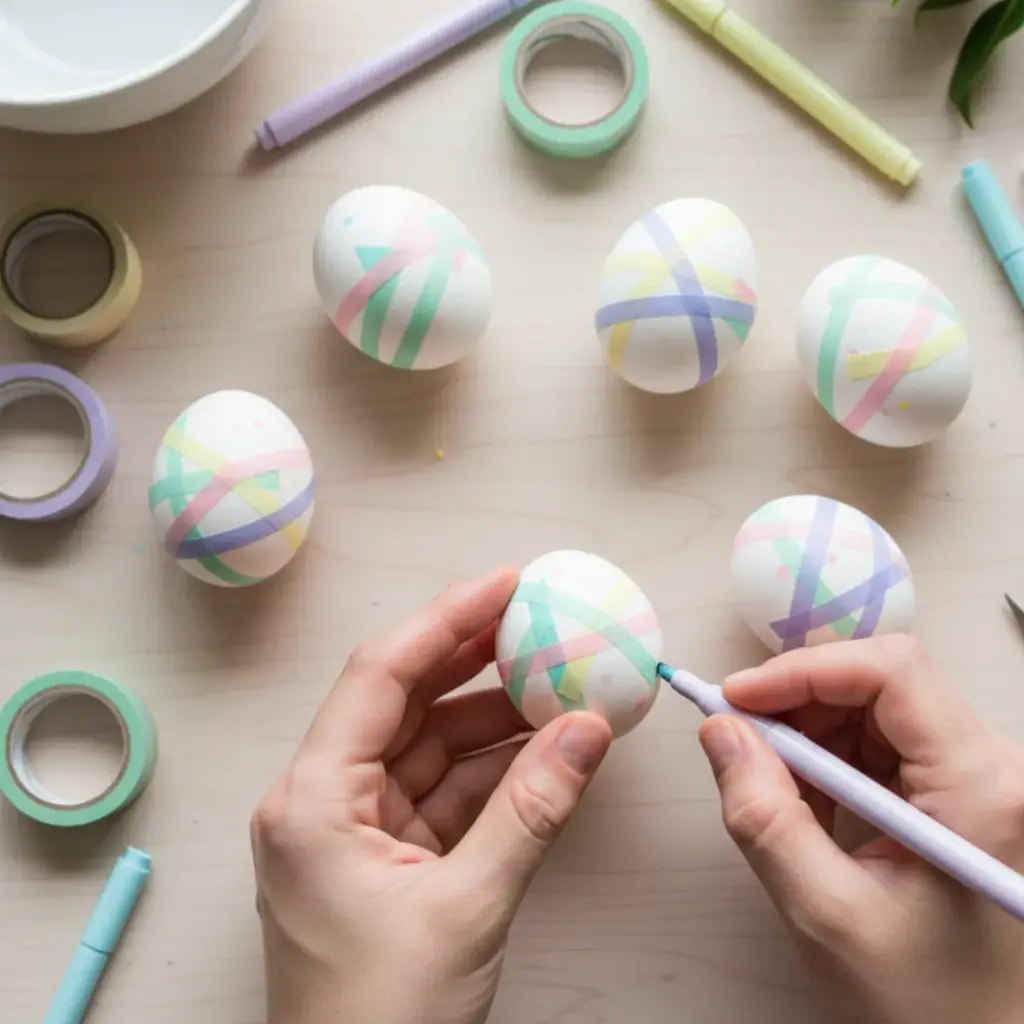
If you can’t draw a straight line to save your life (guilty!), washi tape is your best friend.
You just snip tiny triangles or strips and stick them directly onto the shell.
It’s the cleanest DIY you’ll ever do.
- Cut tape into thin 1/8-inch strips.
- Criss-cross them around the midsection of the egg.
- Fill the gaps with different pastel markers.
7. The Whipped Cream Alternative
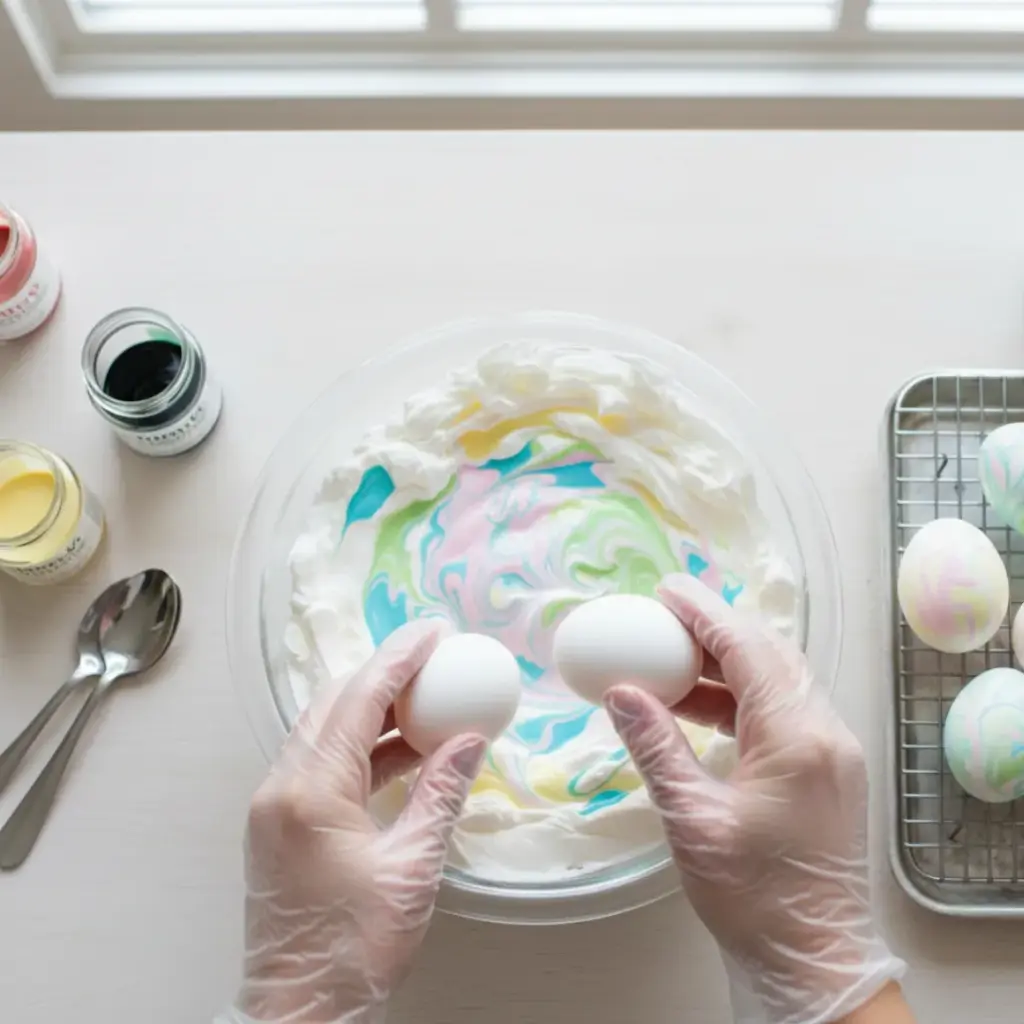
For those who find shaving cream a bit… inedible… whipped topping works just as well.
It’s the food-safe version of the marble technique.
Just keep in mind that the colors come out a bit more “watercolor” and less “neon.”
- Cool Whip holds its shape better than canned spray.
- Wear gloves unless you want “Easter hands” for forty-eight hours.
- This works best on room-temperature eggs.
8. Silk Tie Transfer Magic

This one feels like a science experiment gone right.
You wrap raw eggs in 100% silk fabric (old ties are perfect) and boil them in vinegar water.
The pattern literally jumps off the fabric and onto the egg.
- Check the label; polyester won’t work for this.
- The crazier the tie pattern, the better the result.
- Boil for a full 20 minutes to ensure a crisp transfer.
Isn’t it satisfying to finally find a use for that hideous tie from 1994?
9. Natural Onion Skin Dye
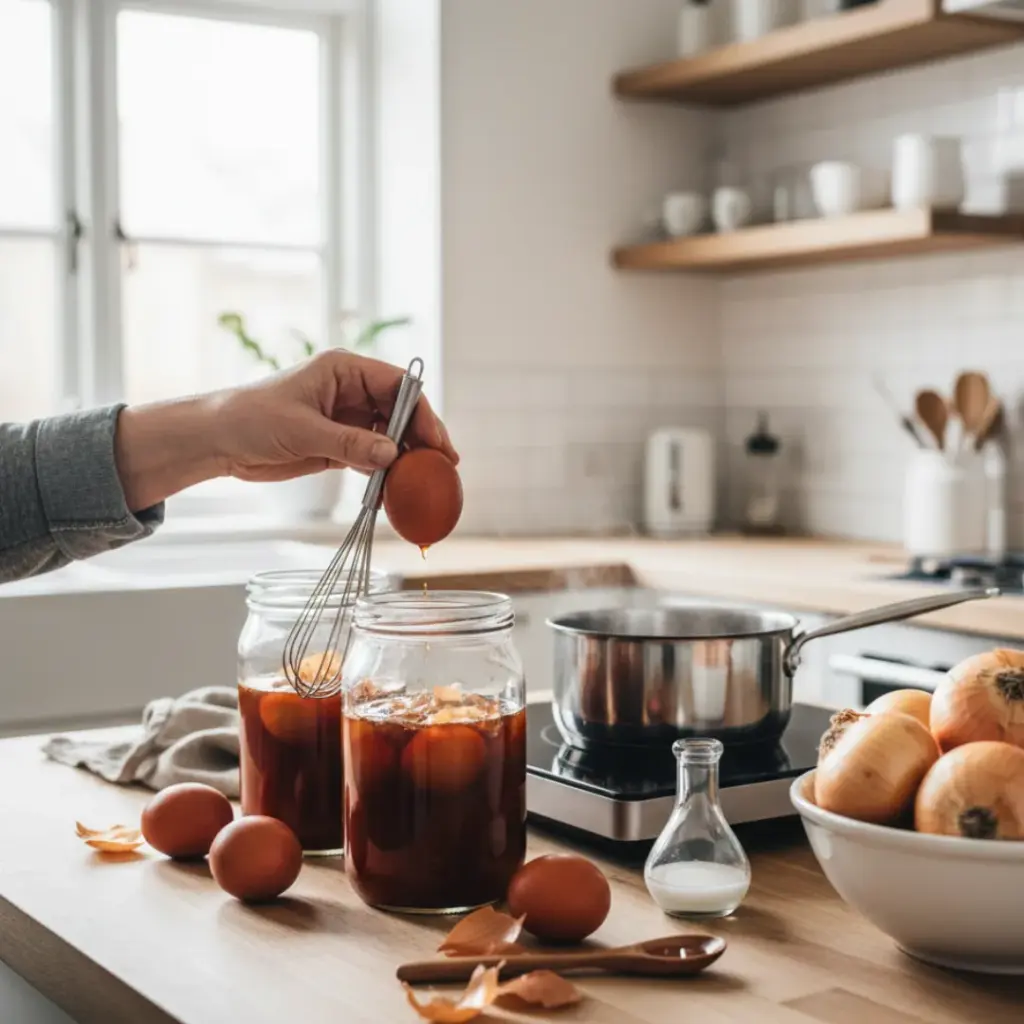
My grandmother swore by this, and honestly, the deep earthy red you get is unbeatable.
You simmer yellow onion skins in water to create a potent, non-toxic dye.
It’s cheap, sustainable, and looks incredibly rustic.
- Boil two cups of skins in water for 30 minutes.
- Add a tablespoon of vinegar to set the color.
- Strain and soak your eggs until they reach a rich mahogany.
10. Minimalist Sharpie Art
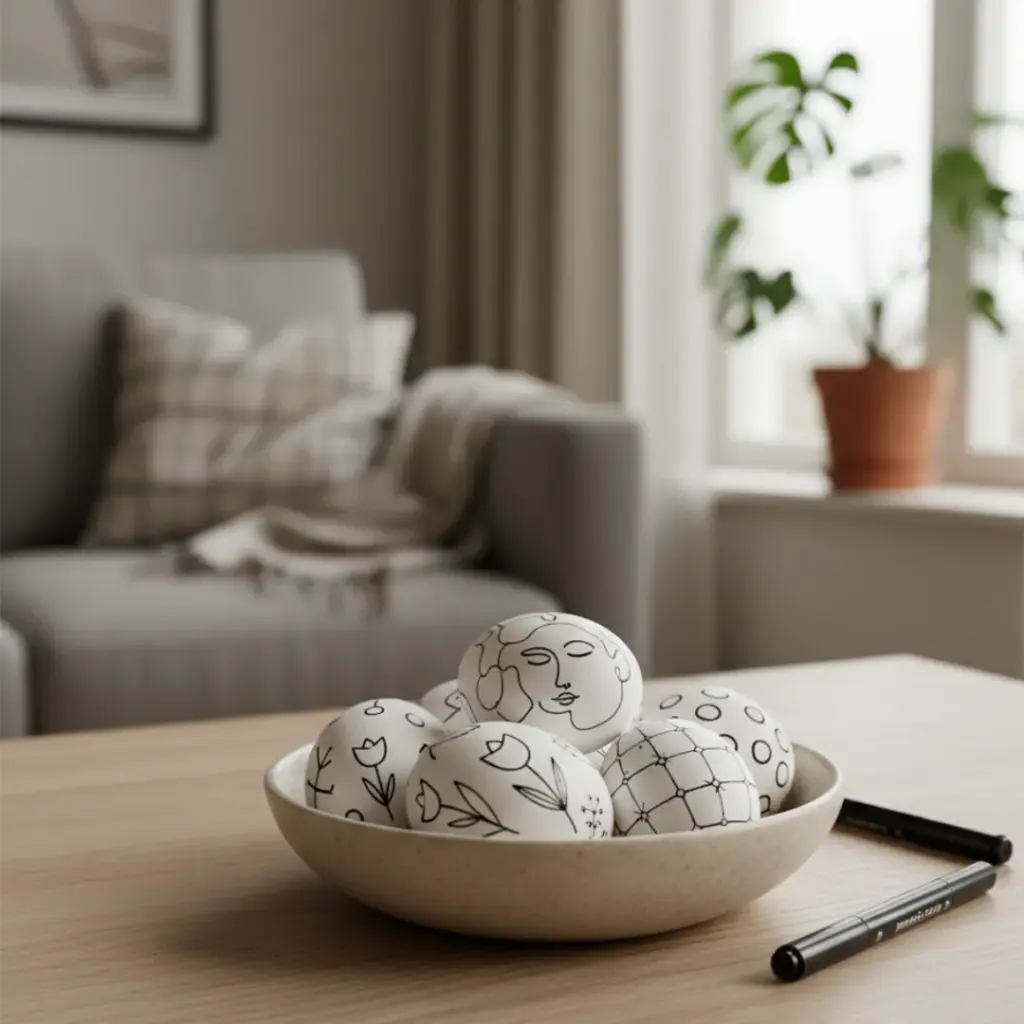
Sometimes, less is more. I love taking a fine-tip black marker to a plain white egg and drawing simple vines or tiny dots. It’s meditative, quiet, and doesn’t involve a single drop of messy liquid.
- Draw simple “scandi-style” flowers.
- Try a “continuous line” drawing for a modern look.
- Stick to black ink for the highest visual impact.
Why do we always overcomplicate things when a marker does the job?
11. Indigo Shibori Style
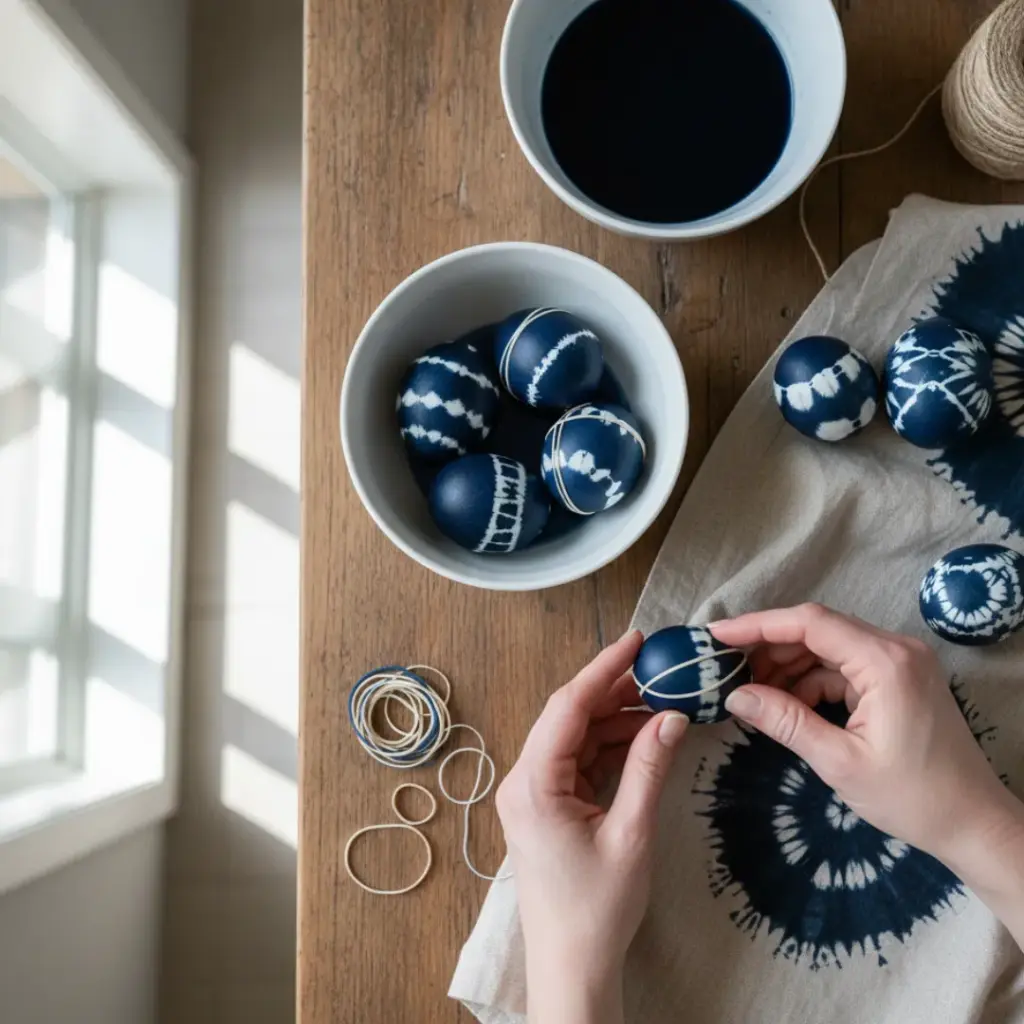
If you’re obsessed with denim, this is for you.
You use blue dye and rubber bands to create patterns that look like Japanese Shibori fabric.
The tighter the bands, the sharper the white lines will be.
- Vary the width of your rubber bands for interest.
- Dip the egg multiple times for a deep navy hue.
- Remove the bands only once the egg is bone dry.
12. Rice-Texture Speckles
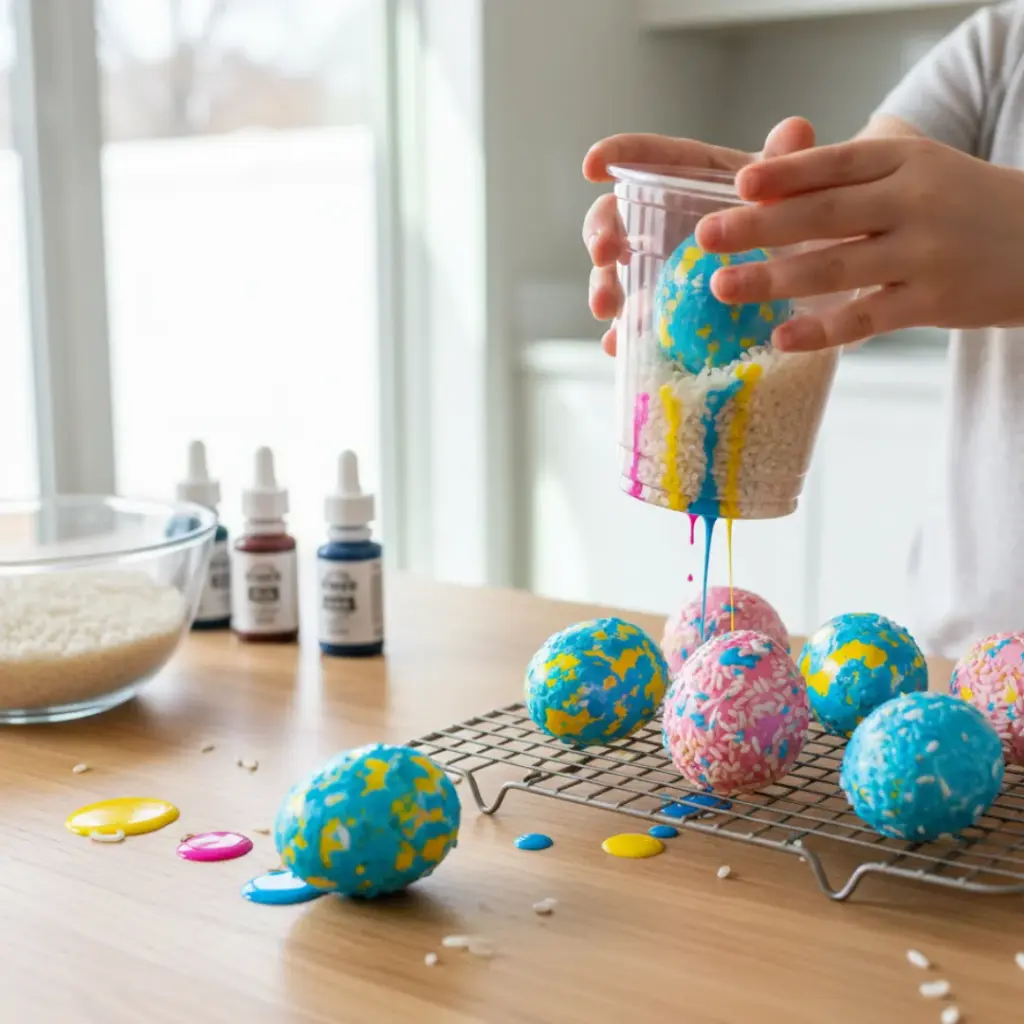
This is my go-to for kids because it’s basically impossible to mess up.
You put dry rice and dye in a plastic cup, drop the egg in, and shake it like a maraca.
The rice creates a beautiful, pebbled texture.
- Fill a cup with 1/4 cup of rice.
- Add 10 drops of liquid food coloring.
- Gently shake the egg inside for 30 seconds.
FYI, this is the loudest decorating method, but also the fastest. 🙂
13. Tissue Paper Bleeding
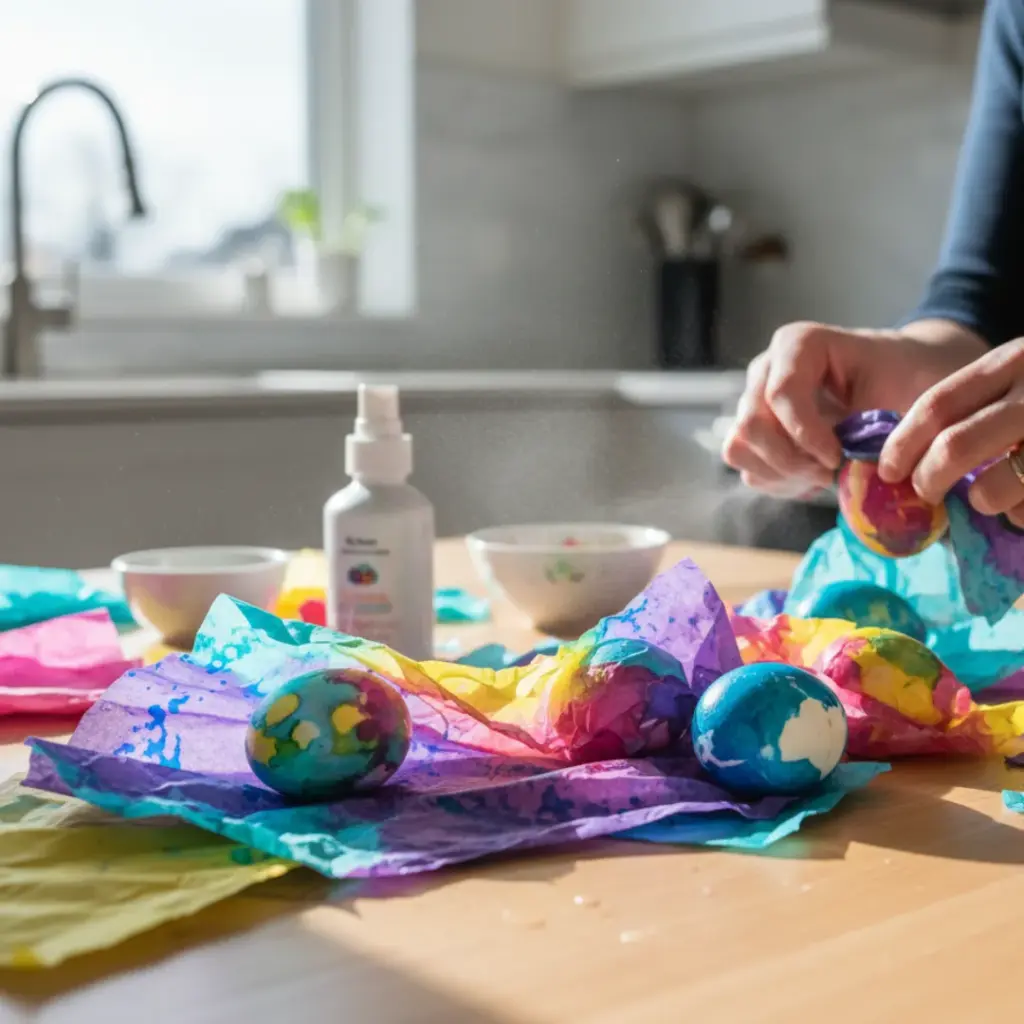
This is basically “dyeing for lazy people,” and I am here for it.
You wrap wet eggs in scraps of bleeding tissue paper.
As the paper dries, it transfers its pigment in a beautiful, blotchy, abstract pattern.
- Ensure the tissue paper is “bleeding” type, not “colorfast.”
- Overlap different colors to create new shades.
- Spray with a little water if the paper starts to peel too early.
Comparison of Popular Methods
| Method | Mess Level | Skill Required | Time Investment |
| Shaving Cream | High | Low | 20 Mins |
| Silk Ties | Low | Medium | 40 Mins |
| Sharpie Art | Zero | Low | 5 Mins |
| Onion Skins | Medium | Low | 60 Mins |
Essential Supplies Checklist
- White and Brown Eggs: Different base colors change the dye outcome.
- Vinegar: This acts as the “mordant” to make colors stick.
- Rubber Bands: Perfect for creating “resist” patterns.
Pro-Tips for Success
- Always start with room temperature eggs to prevent cracking in the boil.
- Rub a tiny drop of vegetable oil on finished eggs for a glossy shine.
- Use a wire whisk to hold eggs while dipping—it’s the ultimate life hack.
Wrapping It Up
Decorating eggs shouldn’t feel like a chore or a high-stakes art competition.
Whether you’re going for the “museum-worthy” silk transfers or just shaking eggs in a cup of rice, the goal is to have a bit of fun.
Personally, I think the “mistakes” usually have the most character anyway.
Which of these are you brave enough to try this weekend?