
Halloween decorations can be costly, messy, and complicated. But paper garlands?
If you want 13 fun and creative Halloween paper garland tutorials, you’re in the right spot.
I’ve made garlands with preschoolers, teens, and even some hesitant adults. Some looked great on Pinterest.
They’re the real stars of the spooky season. They’re budget-friendly, easy to make, and add a festive touch without needing a fog machine or special skills.
Others had their own unique charm. Still, each one brought spooky vibes to my space. Ready to grab your scissors?
1. Classic Jack-O’-Lantern Garland 🎃
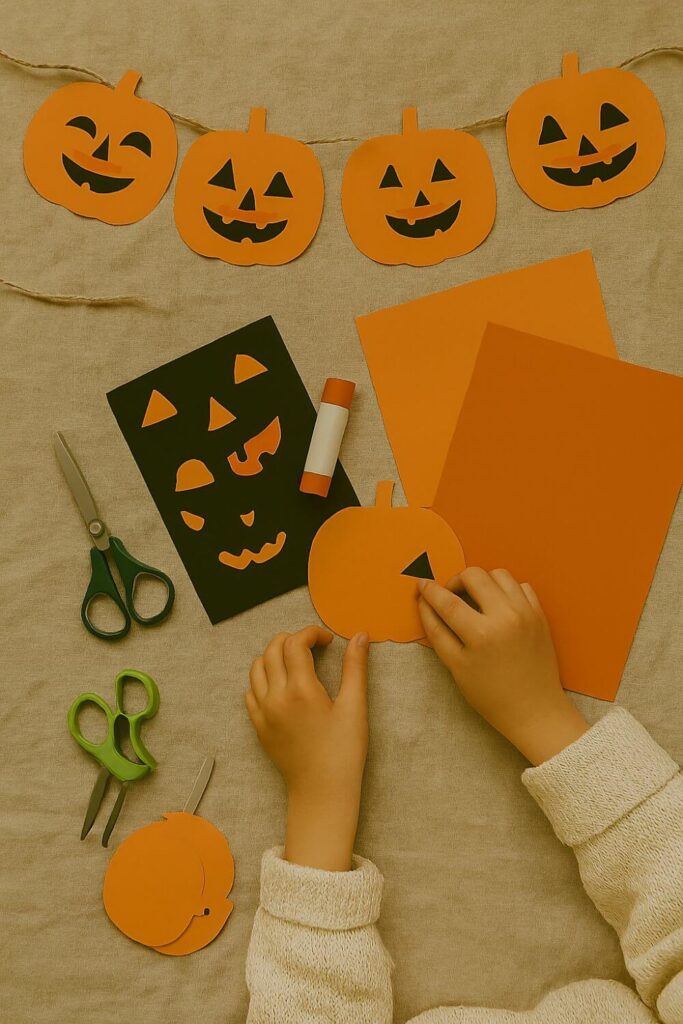
Why it works: It’s iconic, cheerful, and perfect for all ages.
What You’ll Need:
- Orange construction paper
- Black paper for faces
- String or ribbon
- Glue or tape
How to Make It: Cut out pumpkin shapes. Let kids design faces using black paper or markers. Attach to string and hang across a doorway or mantel.
Pro tip: I once made a pumpkin with vampire fangs. It was ridiculous. It was glorious.
2. Ghost Chain Garland 👻
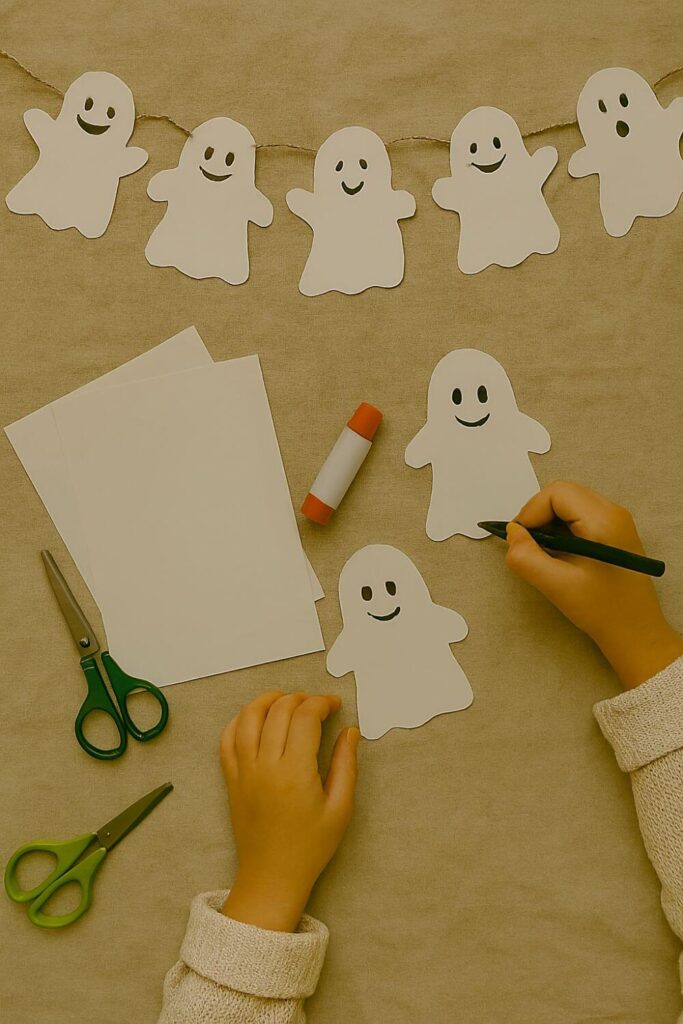
Why it’s adorable: It’s spooky without being scary.
Supplies:
- White paper
- Black marker
- Scissors
- String
Steps: Cut out ghost shapes (think rounded blobs with arms). Draw eyes and mouths. Tape or glue to string and hang.
FYI: I let my niece draw the faces once. One ghost looked like it was crying. Another had a mustache. 10/10 creativity.
3. Bat Silhouette Garland 🦇
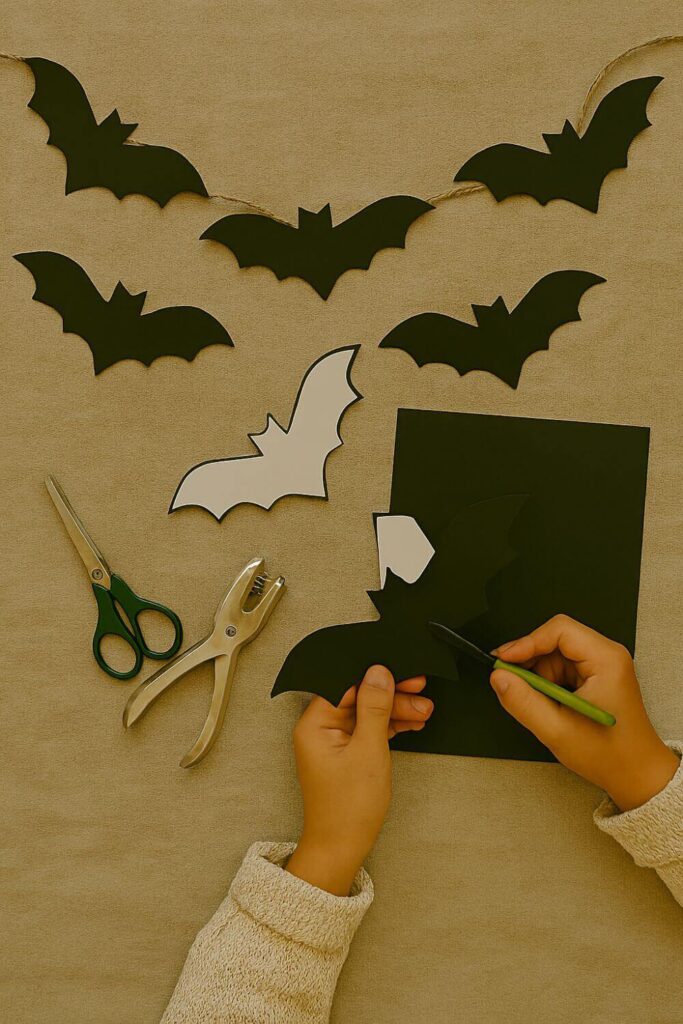
Why it’s sleek: It adds drama and movement.
Materials:
- Black cardstock
- Bat template
- Hole punch
- String or fishing line
Instructions: Trace and cut out bat shapes. Punch holes in the wings and thread onto string. Hang in a zigzag pattern for flying effect.
Rhetorical moment: Ever seen bats “fly” across your living room? You should.
4. Candy Corn Garland 🍬
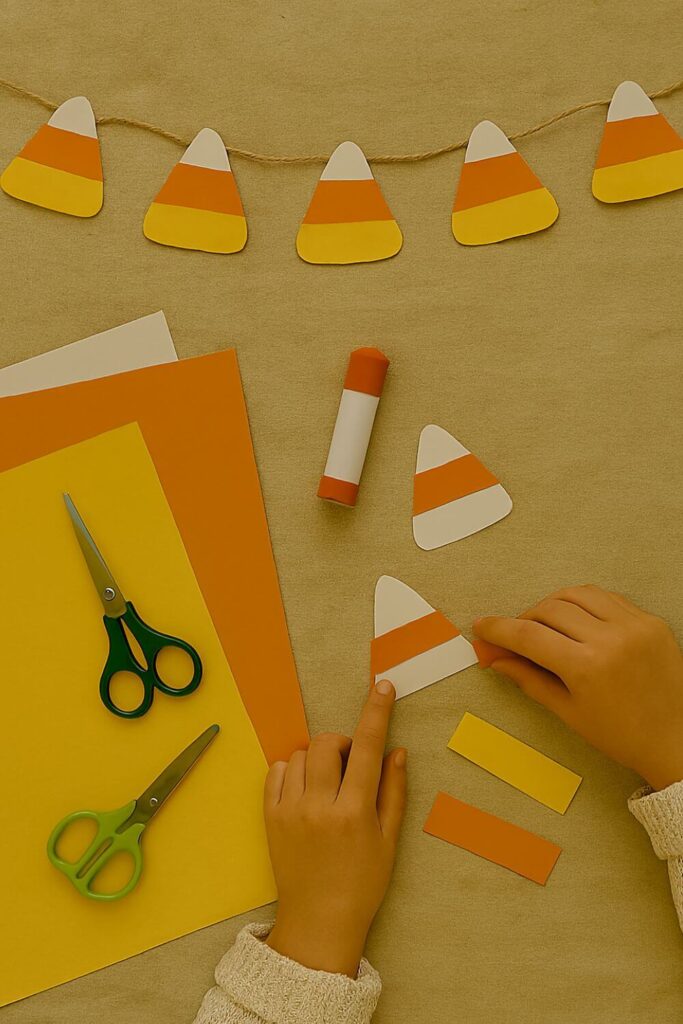
Why it’s sweet: It’s colorful and instantly recognizable.
What You’ll Need:
- White, orange, and yellow paper
- Scissors
- Glue
- String
How to Make It: Cut triangles from white paper. Add orange and yellow stripes. Glue onto string and hang.
Personal tip: I made this for a classroom party. The kids thought it was real candy. Oops.
5. Witch Hat Garland 🧙♀️
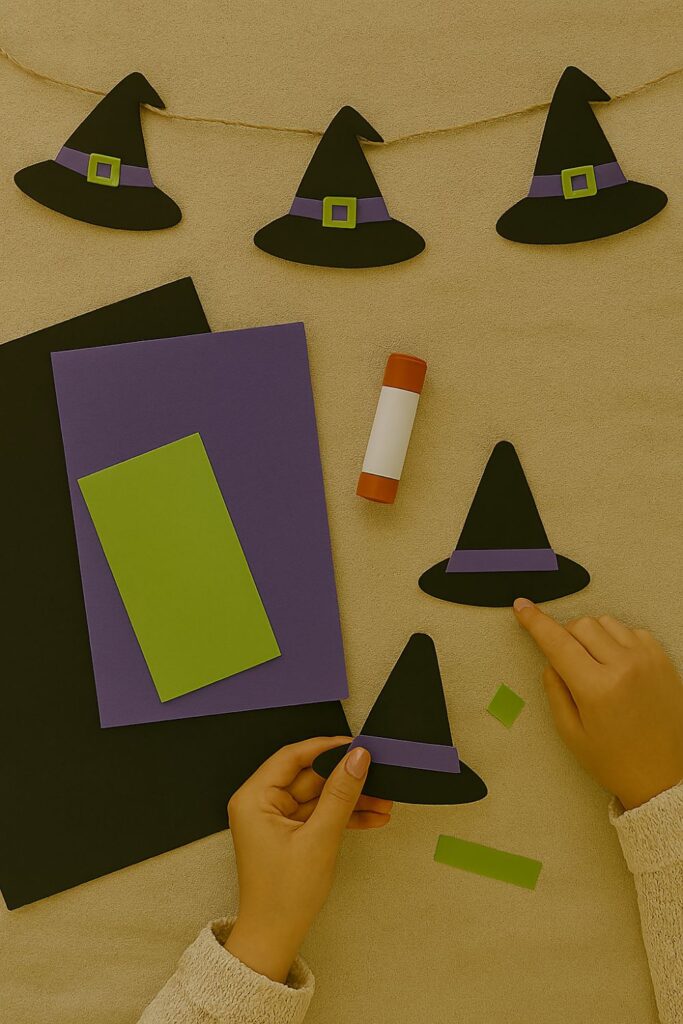
Why it’s magical: It adds a whimsical touch.
Supplies:
- Black paper
- Purple and green accents
- String
- Glue
Steps: Cut out witch hat shapes. Decorate with stars, ribbons, or glitter. Attach to string and hang.
FYI: This one’s great for pairing with a witch-themed party or costume corner.
6. Skeleton Garland 💀
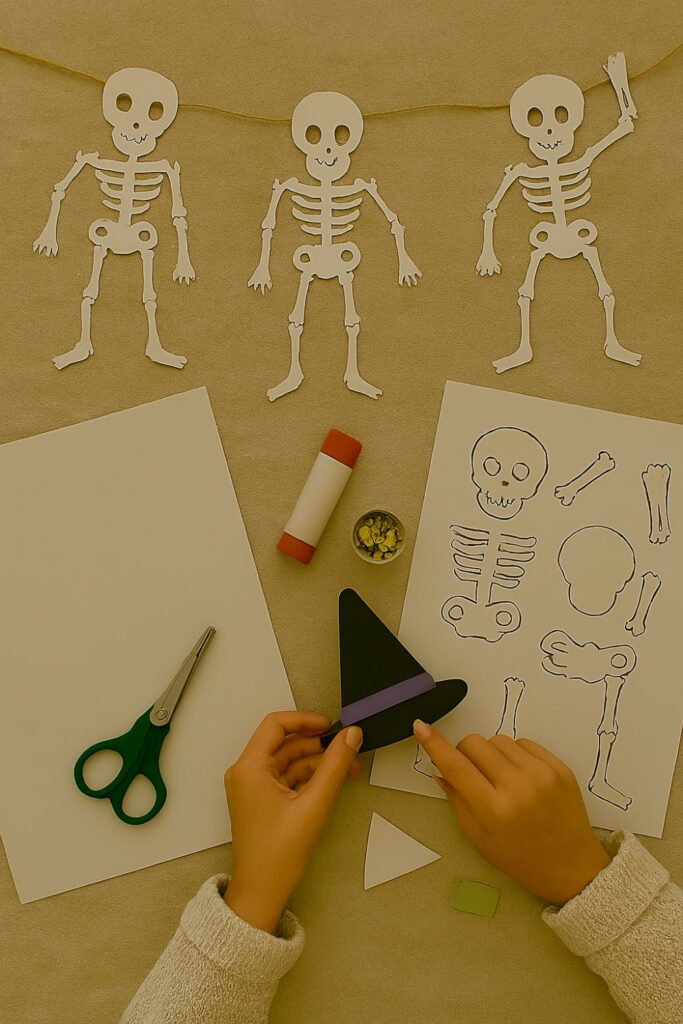
Why it’s creepy (in a fun way): It’s perfect for older kids or adults.
Materials:
- White paper
- Skeleton template
- Brads (optional for movable joints)
- String
Instructions: Cut out skeleton parts. Assemble with brads or glue. String them together in a dancing pose.
Pro tip: I once made a skeleton doing the splits. It was both impressive and mildly disturbing.
7. Spider Web Garland 🕸️
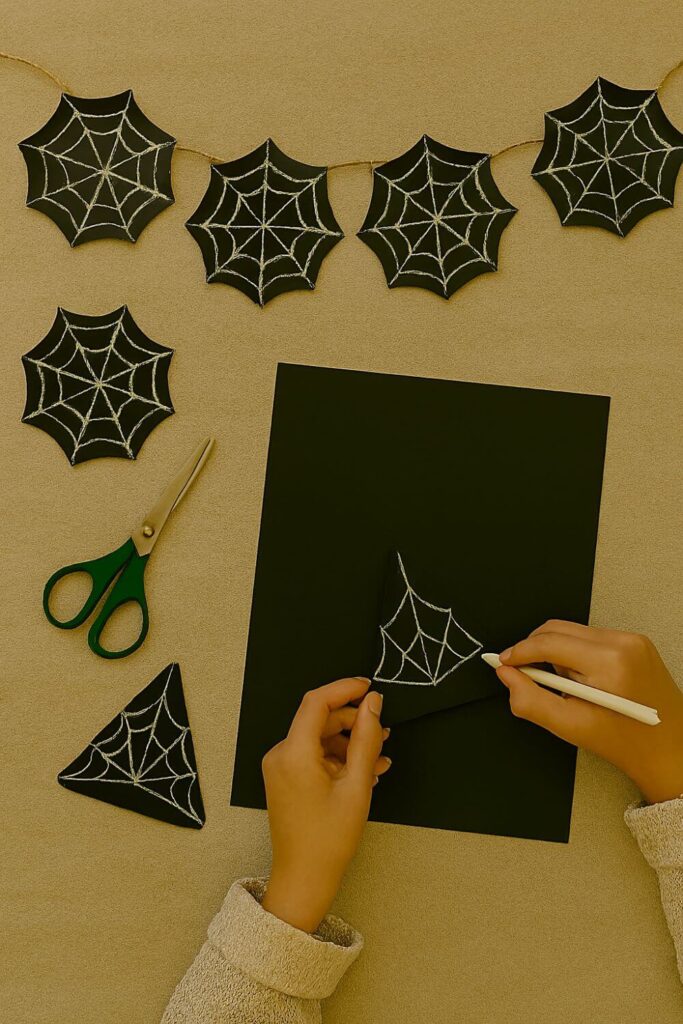
Why it’s intricate: It adds texture and spooky flair.
What You’ll Need:
- Black paper
- White pencil or chalk
- Scissors
- String
How to Make It: Draw spider webs on black paper. Cut them out carefully. Attach to string and hang.
Personal tip: I added tiny plastic spiders once. The effect was creepy and awesome.
8. Monster Face Garland 👹
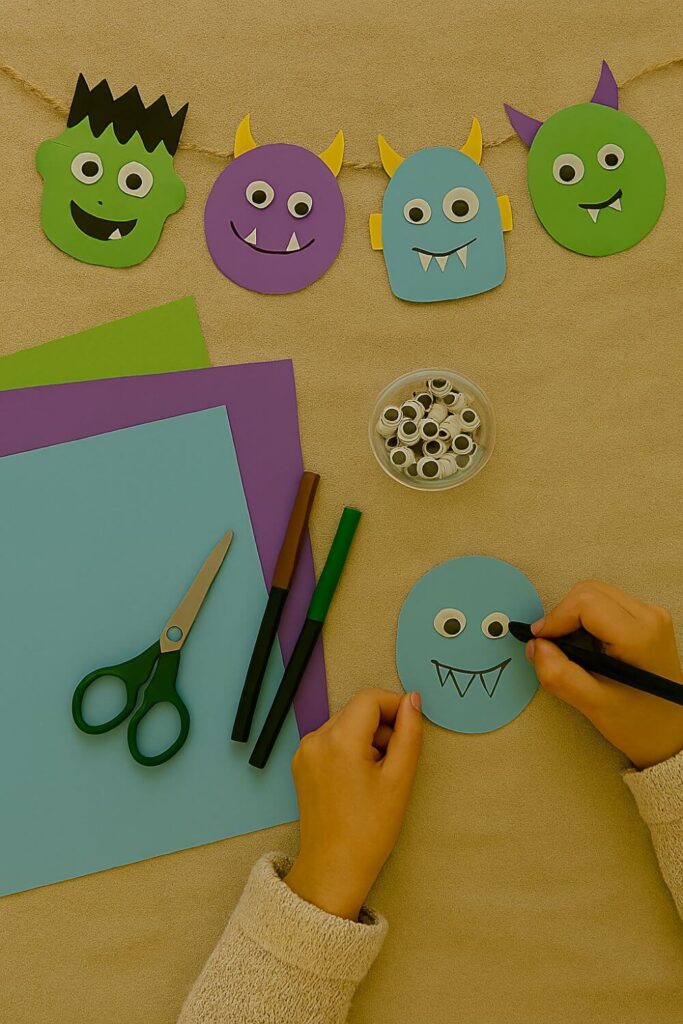
Why it’s silly: It’s full of personality.
Supplies:
- Colored paper (green, purple, blue)
- Googly eyes
- Markers
- String
Steps: Cut out monster head shapes. Decorate with eyes, mouths, and wild hair. String them together.
FYI: This one’s perfect for preschoolers. The weirder the face, the better.
9. Black Cat Garland 🐱
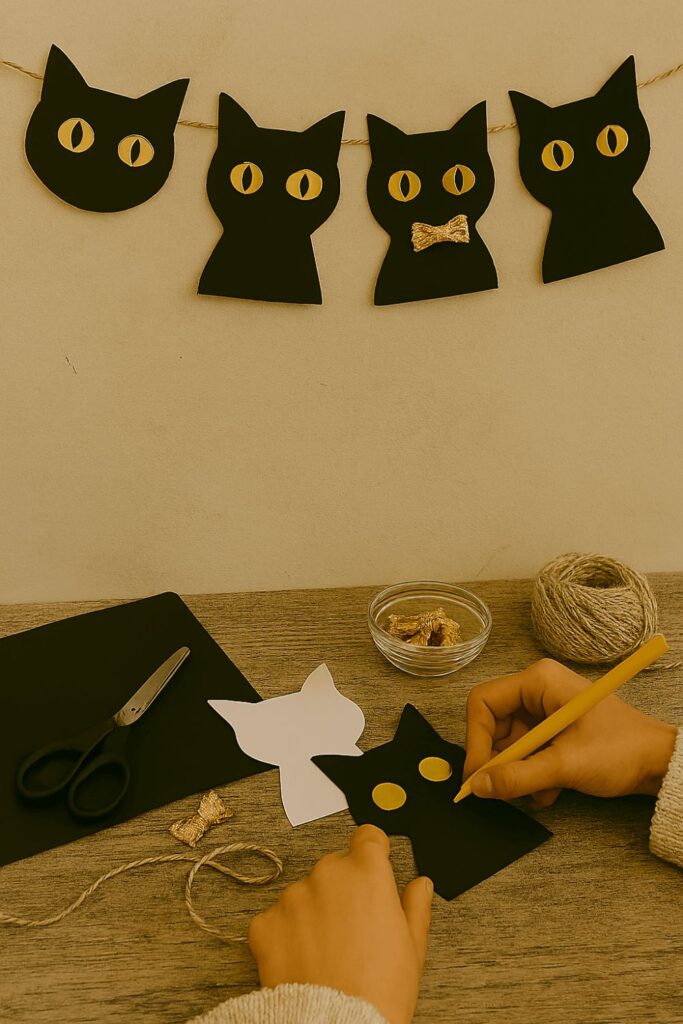
Why it’s sleek: It’s spooky and stylish.
Materials:
- Black paper
- Cat template
- String
- Optional: glitter or bows
Instructions: Cut out cat shapes. Decorate with eyes or accessories. Hang across windows or walls.
Rhetorical question: Who says Halloween can’t be chic?
10. Haunted House Garland 🏚️
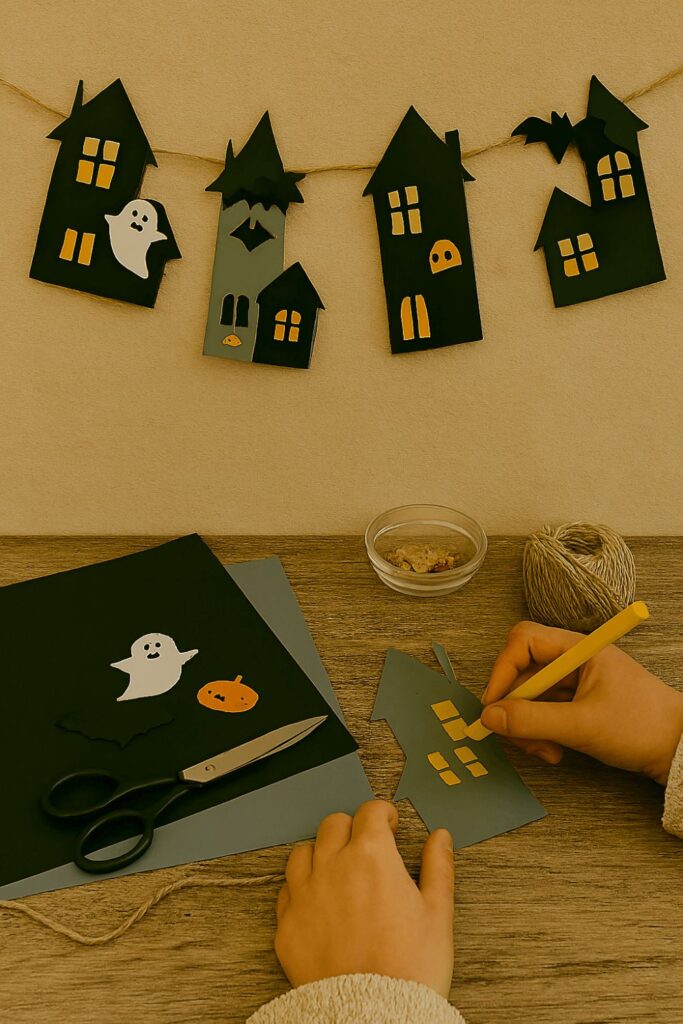
Why it’s detailed: It tells a story.
What You’ll Need:
- Black and gray paper
- House shapes
- Ghosts, bats, and pumpkins for accents
- String
How to Make It: Cut out haunted house shapes. Add spooky details. String together like a creepy neighborhood.
Personal tip: I made one with a graveyard scene. It was a hit with the older kids.
11. Trick-or-Treat Garland 🍭
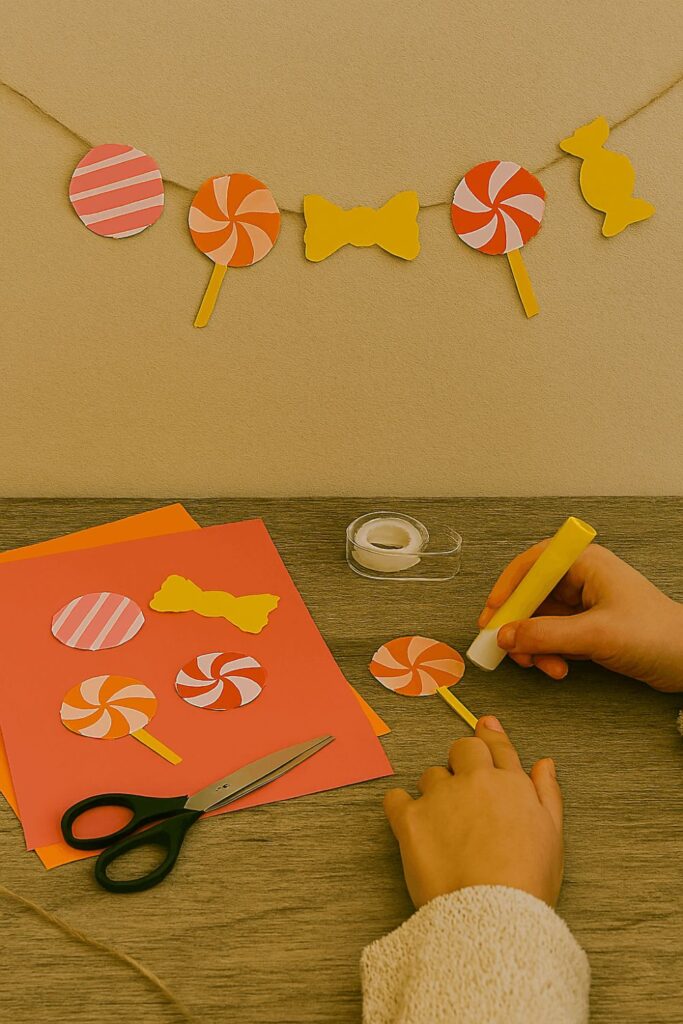
Why it’s festive: It celebrates the best part of Halloween—candy.
Supplies:
- Paper candy shapes
- Bright colors
- String
- Tape or glue
Steps: Cut out candy shapes. Decorate with stripes, swirls, and sparkles. Hang across your snack table or entryway.
FYI: This one’s great for party setups. Just don’t let guests try to eat it 🙂
12. Halloween Word Garland 🔤
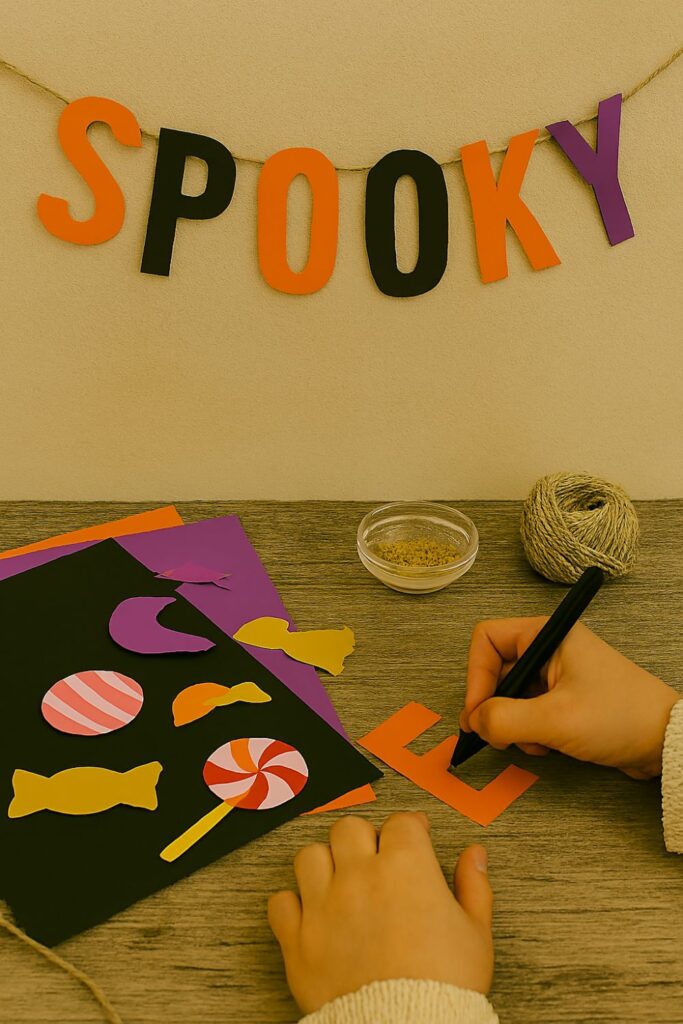
Why it’s customizable: You can spell anything spooky.
Materials:
- Letter cutouts (BOO, EEK, SPOOKY, etc.)
- Colored paper
- String
- Optional: glitter or stickers
Instructions: Cut out letters. Decorate and string together. Hang wherever you need a festive message.
Pro tip: I made one that said “CREEP IT REAL.” Got laughs. Got compliments. No regrets.
13. Paper Chain Garland 🧻
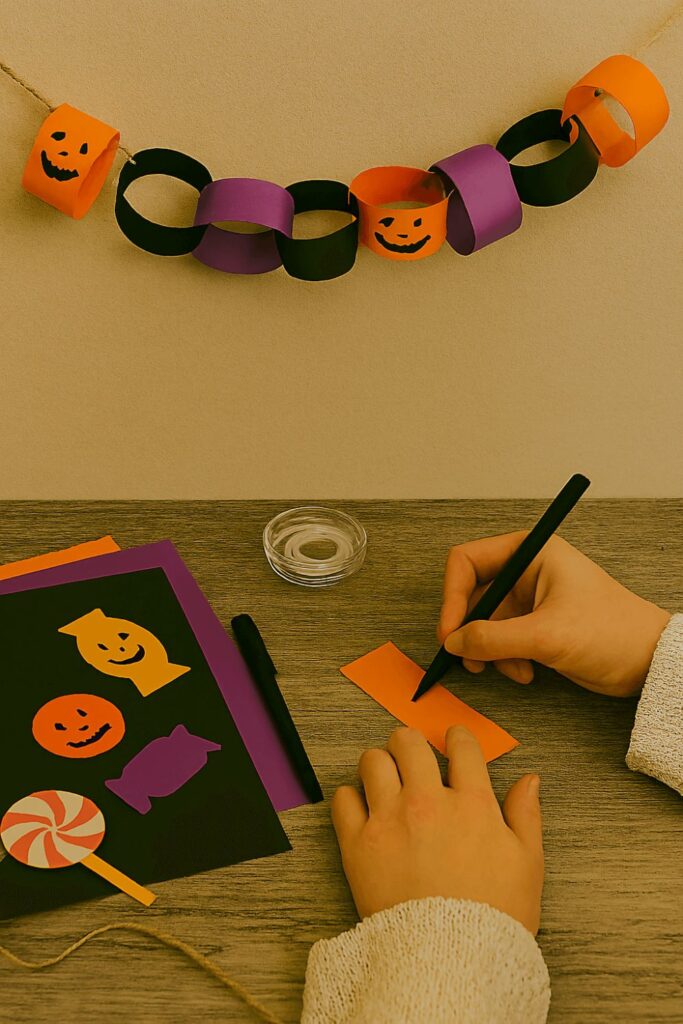
Why it’s classic: It’s easy, fast, and endlessly customizable.
What You’ll Need:
- Strips of colored paper
- Glue or tape
- Optional: draw faces or patterns
How to Make It: Loop strips into circles and connect. Alternate colors for a festive look.
Personal tip: I made a chain with alternating pumpkins and ghosts. It looked like a spooky friendship bracelet for my wall.
Quick Tips for Halloween Garland Success 🎨
Before you start cutting like a possessed crafter, here are a few sanity-saving tips:
- Use cardstock or construction paper. It holds up better than printer paper.
- Prep your shapes ahead of time. Especially if crafting with kids.
- Mix textures. Add glitter, tissue paper, or stickers for extra flair.
- Hang with command hooks or tape. No need to hammer nails into your walls.
- Let kids help. They love designing faces, choosing colors, and naming their creations.
Final Thoughts
Halloween paper garlands are the perfect mix of festive and functional.
They’re easy to make, fun to customize, and add instant charm to any space.
Whether you go for ghost chains, monster faces, or a full-on haunted house parade, these 13 Halloween paper garland tutorials will help you decorate like a spooky superstar.
So grab your scissors, summon your inner witch, and start crafting. And hey—if your bat garland ends up looking like flying potatoes, just call it “abstract horror” and roll with it 😉